Overview |
You have Ember setup on your device and want to print some tags. Here's some helpful instruction and tips to get you off to a great start.
|
Tag Entry Options
|
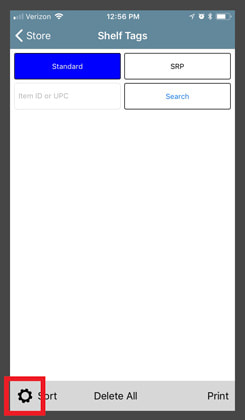
On Ember you can add tags by scanning with your phone's camera, manually keying in the item ID with keypad, or by search. By default, the camera is used for entry. To switch from camera to keypad, tap the settings cog at the bottom of the Shelf Tag screen.
|
|
|
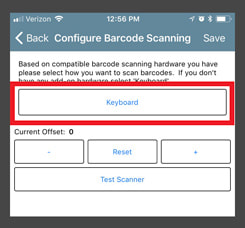
Tap on the current Camera selection to bring up other input options and select Keyboard (Manual Entry) from the list.
|
|
|
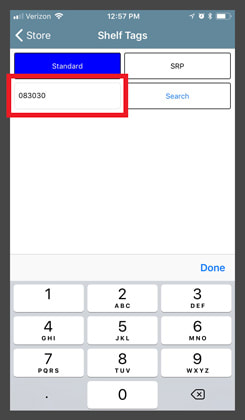
Save your selection (top right). You will now be taken back to the Shelf Tag screen. Select which tag type you want to add: Standard or SRP. Then tap the Item ID or UPC field to bring up the keypad for manual input.
|
|
Connecting Brother Printer to Wifi
|
Depending on the router in there store, there are two ways to connect the printer to Wifi:
WPS
Wifi-Direct Manual
|
First Print Alignment
|
The first time you print with Ember, the app needs to have its alignment configured with your specific printer model. To avoid wasting label stock, use some sheets of paper to get alignment close, then switch to label stock to fine-tune. The print alignment is on the same screen you select your printer on, and the final screen before the print preview.
|
|
|
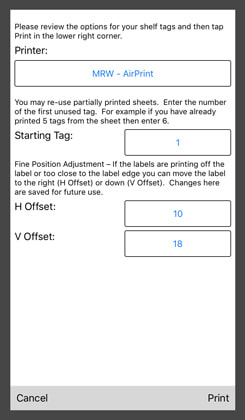
On this screen you will see the Horizontal Offset and Vertical Offset that control where the printer will start printing.
In preparation for setting the values, add about 14 tags to the list of tags to be printed. This will help ensure final horizontal and vertical alignment appropriate for the whole page of tags to print correctly. Now, set the H Offset to 10, and the V Offset to 20 and do a test print to a blank piece of paper. Check the print alignment against the label stock. If alignment looks close, proceed with a second print using the same values on shelf-tag stock. If alignment is still somewhat off, adjust the H and V Offset by a value of 2 with each test as necessary. The larger the V Offset number, the further down the page the printing begins. The higher the H Offset values is, the further right that printing begins. After each print, the app will ask if the tags printed successful, when you say "yes", the app will remember the H Offset and V Offset for future printing, but just to be safe, record these values for future reference, should for any reason you need to input them again. |
Changing Retail
|
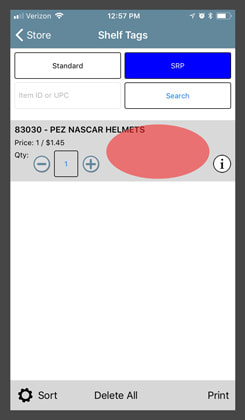
Ensure you've added items to your SRP shelf-tag list. Now select the item you wish you change the retail on, by tapping anywhere on the line that doesn't have a button, as shown by the red highlighted area in the image below.
|
|
|
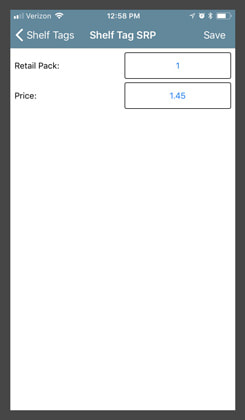
This will bring up a screen with the current Retail Pack and Price.
|
|
|
Now select the current Price field and change the the price to the value that you want. Tap Save (top right) to exit this screen and to commit the retail price change.
|